

The ultimate guide to painting midsoles!
How do I paint my midsoles? A step-by-step guide
Do you want to give your sneakers a fresh, unique look? Painting midsoles is a fantastic way to achieve this! Below is a detailed guide to painting midsoles, focusing on the essential steps, tips and tricks. Perfect for both beginners and experienced sneaker enthusiasts.
Supplies:
- Quality paint suitable for midsoles ( Angelus , SneakersER , Alpha 6)
Please note! Some paint needs to be mixed to make it suitable - Sneaker Essentials Essential Deglazer
- Cotton balls and cotton swabs
- Masking tape
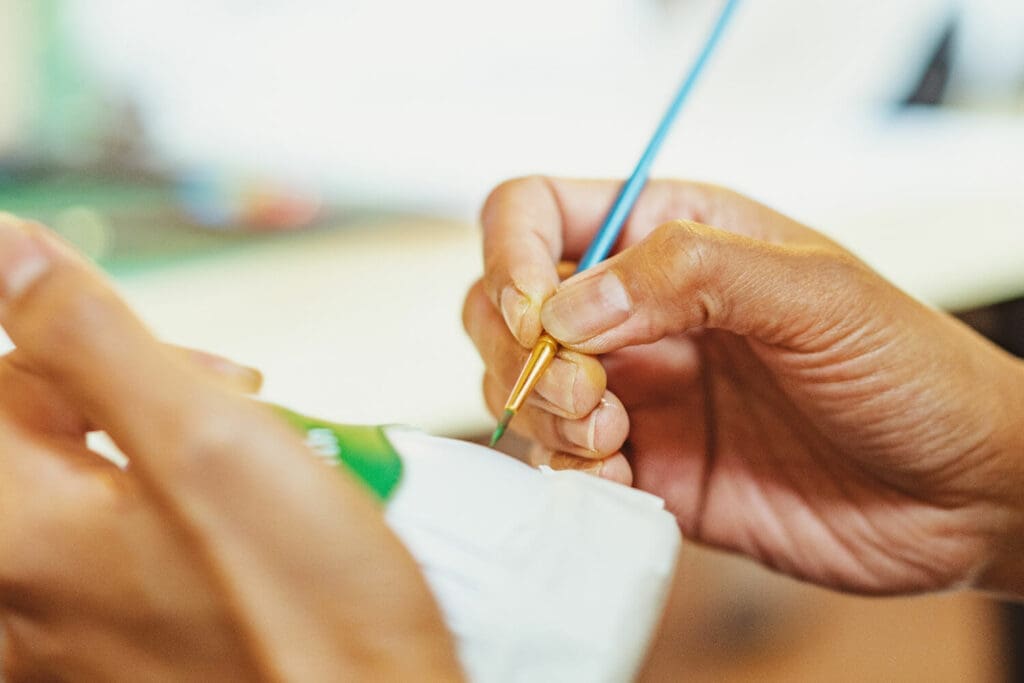
- Fine detail brushes and/or airbrush
- Gloves for protection
- Finisher for a matte, glossy or satin finish.
How do I prepare the midsole?
Step 1: Preparation
- Cleaning and Stripping : Start by removing old layers of paint. Use the Essential Deglazer to gently strip the paint or factory coat. Work in sections and ensure that the entire surface is covered. Take your time with this!
- Masking : Use masking tape to mask off the areas you don't want to paint, such as the top of the sneaker and the bottom sole. This ensures clean and professional lines. You can the masking tape for this.


Step 2: The painting process
- Color choice : Decide which colors you want to use. For multicolored midsoles, plan your design in advance.
- Thin Coats : Applying multiple thin coats is crucial. This prevents cracks and provides a more durable finish. Allow each coat to dry completely before applying another coat.
- Detail work : Use a fine brush for detailed work and clean edges. Be patient and accurate for best results.
- Masking Sections : Use tape to separate different color sections. Make sure the paint is dry before applying tape to prevent the paint from coming off.
- Base coat : Start with the lightest color as your base. This is especially important when working with transparent or semi-transparent colors.
- Blending : If you want to blend colors for a gradient effect, work quickly and blend the colors while they are still wet for a smooth transition.

Step 3: Finishing
- Final Checks : Check the midsoles for imperfections or uncovered areas. Touch this up with a small brush. Also make sure that the color intensity is the same everywhere.
- Finishing : Use a finisher for a protective top coat. Choose from matte, gloss or satin finish depending on your desired appearance. All finishers can be found here.

Step 4: Final Check and Maintenance
- Carefully remove the masking tape. and allow the sneakers to dry completely before use.
Tips for a perfect result:
- Practice on an old pair of sneakers first to become familiar with the materials and techniques.
- Watch tutorials and attend workshops to improve your skills.
- Do not hurry; carefulness leads to the best result.
- Use quality materials for a long-lasting result.
FREQUENTLY ASKED QUESTIONS
Drying time varies, but allow at least 20-30 minutes per coat. you can speed up the process with a heat gun or hairdryer.
It is not a requirement, but a finisher will ensure that the paint wears off less quickly. So it is highly recommended.
No. It is important to use special midsole paint that remains flexible and adheres well to the midsoles. You can find all midsole paint here.
You can also use paint from Angelus or Alpha 6 for midsoles. However, we recommend SneakersER paint for midsoles.
You can carefully remove small mistakes with the Essential Deglazer and a cotton swab.
That depends on the coverage you want to achieve. usually 2-3 thin layers are sufficient.
Sanding is not always necessary, but a light sanding can help to ensure even better paint adhesion.
Yes, an airbrush is an excellent tool for an even and professional finish
Use thin coats of paint and make sure each coat is completely dry before applying another coat. A flexible type of paint and the use of a finisher also help.
If the paint appears uneven, apply additional thin coats until you get even coverage.
That's certainly possible. We often recommend a neutral base coat such as light gray before lightening it up.
It is often easier to apply a dark color over a lighter color than the other way around.